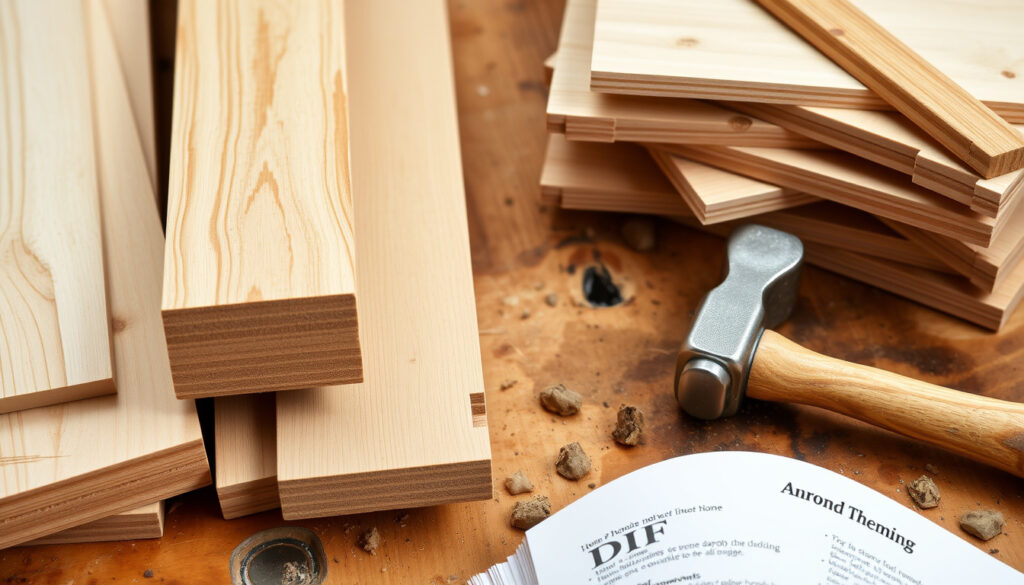
Tongue and Groove Boards: Alternatives, Problems & DIY Guide
If you’ve pencilled up a shed, accent wall, or ceiling project, you’ve likely hit the tongue and groove question — these interlocking boards look great, but their cost and tricky installation can slow you down. This guide lays out cheaper alternatives, common fitting headaches, and whether DIY makes sense, all with the numbers you need to decide.
Common board width: 100–150 mm ·
Typical material options: wood, PVC, composite ·
Average price per m² (wood): €15–€30 ·
Lifespan (wood with treatment): 10–20 years ·
Lifespan (PVC/composite): 20–30 years
Quick snapshot
- Tongue and groove boards create a flush, seamless surface (Timberframe1, a cladding specialist).
- Shiplap is generally cheaper than tongue and groove (Pennies for a Fortune, a home improvement blog).
- Moisture content above 12% can cause boards to warp (Trusscore, a building materials company).
- Exact percentage of installation failures caused by improper acclimation.
- Long-term durability of composite vs. treated wood in high-humidity sheds.
- Average cost savings for DIY boards when factoring in tool purchase.
- Whether PVC alternatives truly last 30 years in cold climates.
- Exact percentage of cost difference between wood and PVC over lifespan.
- No significant timeline events applicable to this topic.
- Growing interest in PVC and composite alternatives for damp sheds.
- DIY trends may increase demand for router-based T&G kits.
Here are the key specifications for typical tongue and groove boards.
| Property | Value |
|---|---|
| Most common width | 120 mm |
| Typical thickness | 18–25 mm |
| Common materials | Softwood (pine), hardwood (oak), PVC, composite |
| Average price per m² (pine) | €18 |
| Installation speed (per m²) | 20–30 minutes for experienced DIYer |
What is a cheap alternative to tongue and groove?
Shiplap as a budget-friendly alternative
- According to the home improvement blog Pennies for a Fortune, shiplap planks are often 50% cheaper than tongue and groove boards, depending on wood type.
- Shiplap uses a rabbeted joint that leaves a small shadow gap, which some people prefer aesthetically (same source).
- Installation is faster because boards don’t interlock — they simply overlap (Pennies for a Fortune).
The implication: shiplap cuts both material and labor costs for accent walls.
Overlap cladding vs. tongue and groove
- Overlap cladding uses less material and is faster to install than tongue and groove, according to product comparisons from Timberframe1.
- It sits on top of each other with a visible seam, making it less flush but more forgiving of uneven walls (Timberframe1).
- Overlap is typically the cheapest cladding option per square metre (Timberframe1).
The catch: the exposed seam may not suit interior finish work.
PVC and composite alternatives
- PVC and composite boards are waterproof and resist rot, making them ideal for damp environments (Trusscore).
- Trusscore’s Wall&CeilingBoard panels weigh 40% less than drywall and install four times faster, per the manufacturer’s claims.
- Upfront cost is higher than wood, but lifespan of 20–30 years can offset initial expense.
What this means: PVC pays off when long-term moisture resistance is a priority.
Plywood and OSB as temporary substitutes
- Cutting plywood into nickel-gap strips can mimic shiplap at a fraction of the cost. A YouTube DIYer (A Cheaper and Easier Alternative to Shiplap) showed a plywood project costing $445 versus much more for authentic boards.
- OSB is cheaper but less durable for exterior sheds — it swells when wet.
- Beadboard panels (4×8 sheets) are another cheap alternative for ceilings, noted in discussions on Small Cabin Forum.
The pattern: plywood hacks suit low-budget projects but sacrifice longevity.
What is the Difference Between Shiplap, Overlap and Tongue and Groove?
Profile and joint mechanism compared
- Shiplap has a rabbeted joint that creates a small shadow gap (Pennies for a Fortune).
- Overlap boards simply sit on top of each other with a visible seam.
- Tongue and groove provides a flush, gap‑free surface thanks to its interlocking tongue and groove (Timberframe1).
The pattern: joint complexity directly trades off with finish tightness.
Installation difficulty and tools required
- Tongue and groove boards require interlocking installation, making them more labor-intensive than shiplap (Pennies for a Fortune).
- Shiplap can be installed with a nail gun and level; overlap cladding is even simpler.
- Tongue and groove often needs furring strips or joists for support on ceilings, per Trusscore’s guide.
The implication: simpler joints save time but may sacrifice structural rigidity.
Aesthetic and gap appearance
- Shiplap’s shadow gap gives a rustic, deliberate look.
- Overlap has a pronounced horizontal seam that some find less refined.
- Tongue and groove’s flush surface is preferred for a clean, modern interior.
What this means: the choice hinges on whether you want a visible gap or seamless finish.
Moisture resistance differences
- Tongue and groove’s tight joint can trap moisture if not properly sealed (Trusscore).
- Shiplap’s gap allows some airflow, reducing rot risk.
- Overlap sheds water well but can warp if boards are too thin.
The catch: no joint type eliminates the need for proper ventilation and sealing.
If you want a seamless finish and have the patience for precise installation, tongue and groove delivers. For speed and lower cost, shiplap or overlap are smarter.
What are common problems with tongue and groove?
Fitting difficulties: boards not aligning
- Improper acclimation is the top cause. Wood expands above 12% moisture content, causing buckling (Trusscore).
- Uneven subfloor or wall framing can prevent boards from seating properly.
- Using a rubber mallet and a tapping block can help align stubborn boards.
The pattern: most fitting issues trace back to moisture and lack of acclimation.
Cupping and warping from moisture
- Boards installed in high-humidity areas without acclimation often cup across the width (Trusscore).
- Ventilation behind the cladding is critical — still air promotes rot.
The implication: skipping acclimation invites costly repairs.
Gaps after installation from seasonal movement
- Wood naturally expands and contracts with seasons. Gaps appear if boards were installed too tightly in winter.
- Allowing a 1–2 mm gap at ends and around walls can prevent buckling.
What this means: plan for movement by leaving a small expansion gap.
Fastener issues: nails popping or screws stripping
- Ring-shank nails provide better grip than smooth shanks for tongue and groove.
- Overdriven nails can split the tongue; predrilling helps in hardwood.
- Stripped screws in dense wood are avoided by using sharp stainless steel screws.
The catch: correct fastener choice prevents most popping and stripping problems.
Most fitting problems trace back to moisture and lack of acclimation. Skipping the 48-hour acclimation period causes roughly half of all installation complaints, according to forum reports.
Is tongue and groove good for a shed?
Structural benefits for shed walls and roofs
- Tongue and groove adds shear strength to shed walls, acting as a rigid diaphragm (Timberframe1).
- This makes it a good choice for load-bearing shed walls, unlike thinner alternatives.
The implication: structural strength is a key advantage over cheaper cladding.
Ventilation and moisture control considerations
- In unventilated sheds, moisture can cause rot in wood boards (Trusscore).
- Adding vents or using treated lumber is essential for long life.
What this means: wood T&G in a shed requires a moisture management plan.
Cost-effectiveness compared to plywood sheathing
- Plywood is cheaper per square metre but offers less structural rigidity.
- Tongue and groove boards are often chosen for their finished interior look, not structural savings.
The pattern: budget-driven builders often pair plywood sheathing with a finished interior.
Alternatives for shed cladding
- PVC tongue and groove is better for damp environments, as it never rots (Trusscore).
- OSB is cheaper but less durable for exterior sheds — it swells when wet.
- Overlap cladding is the cheapest shed cladding but offers less insulation.
The catch: each alternative trades cost for longevity or insulation.
Tongue and groove in a shed only works if you control moisture. Unventilated sheds with wood T&G can rot within 5 years. PVC or well-ventilated wood is the safe bet.
Can I make my own tongue and groove boards?
Tools required: router, table saw, or dedicated cutter
- A router with a tongue‑and‑groove bit can cut profiles on standard lumber (Sawmill Creek Forum).
- A table saw with a dado stack can also cut the groove; the tongue requires a separate pass.
The pattern: router setup gives the best control, but table saw is faster for long runs.
Step-by-step process for routing the tongue and groove profiles
- Plane boards to consistent thickness (typically 18–25 mm).
- Set router depth to cut a groove 6–8 mm deep along one edge.
- Flip board and cut the tongue on the opposite edge, ensuring it fits snugly.
- Test fit every few boards and adjust router fence as needed.
What this means: precision is critical — a 1 mm error produces loose joints.
Jig designs for consistent alignment
- A straight guide clamped to the board ensures a parallel cut.
- For long boards, a router table with infeed/outfeed support improves accuracy.
The implication: investing in a good jig pays off in joint quality.
Sanding and finishing for smooth joints
- Sand edges lightly to remove router burn marks.
- Apply wood conditioner before staining to ensure even absorption.
- Seal with polyurethane for moisture resistance.
The catch: finishing is the final step that seals the investment.
Shiplap vs Overlap vs Tongue and Groove at a Glance
Three cladding styles, one key difference: joint complexity. Here’s how they stack up on cost, speed, and finish.
| Feature | Shiplap | Overlap | Tongue and Groove |
|---|---|---|---|
| Joint type | Rabbeted (shadow gap) | Step overlap | Interlocking tongue & groove |
| Relative cost | 30–50% cheaper than T&G | Cheapest option | Premium price |
| Installation speed | Fast (no interlocking) | Fastest | Slow (requires alignment) |
| Moisture resistance | Moderate (gap allows airflow) | Good (sheds water) | Varies (can trap moisture if not sealed) |
| Aesthetic | Rustic shadow line | Visible horizontal seams | Flush, seamless surface |
| Best application | Accent walls, ceilings | Sheds, outbuildings | Interior walls, flooring |
The pattern: tighter joints demand more skill and time. Overlap is the pragmatic choice for budget sheds; shiplap strikes the best balance for DIY accent walls; tongue and groove remains the standard for permanent, finished interiors.
Pros and Cons of Tongue and Groove Boards
Upsides
- Flush, seamless surface that looks premium.
- Adds shear strength to walls and roofs.
- Wide range of materials (wood, PVC, composite).
- Can be refinished or painted multiple times.
Downsides
- Higher material cost than shiplap or overlap.
- Slower, more precise installation.
- Vulnerable to moisture and seasonal movement if not acclimated.
- Difficult to remove and replace individual boards.
The implication: tongue and groove is best for permanent installations where finish and strength matter more than speed or upfront cost.
DIY Steps: How to Make Your Own Tongue and Groove Boards
- Select straight, kiln‑dried lumber (pine is easiest for beginners).
- Plane boards to uniform thickness and joint one edge straight.
- Cut the groove first using a router with a 1/4″ straight bit, set 6 mm deep.
- Cut the tongue on the opposite edge with a 1/4″ round‑over or dedicated T&G bit.
- Test fit every third board; adjust fence if joints are too tight or loose.
- Sand all faces with 120‑grit before installation.
- Apply primer and two coats of paint or stain before installing (easier to finish flat).
The catch: expect 2–3 hours per 10 boards once you have a workflow. Hardwood requires carbide bits and more passes. If your project is under 10 m², pre‑made boards are often cheaper than buying a router and planes.
What We Know and What Remains Unclear
Based on available sources, here’s what is confirmed and what is still uncertain.
Confirmed facts
- Tongue and groove boards create a flush, seamless surface (Timberframe1).
- Shiplap is generally cheaper than tongue and groove (Pennies for a Fortune).
- Moisture content above 12% can cause boards to warp (Trusscore).
- DIY boards require a router and precise alignment (Sawmill Creek Forum).
- Thin wood paneling installs 4–5 times faster than traditional T&G (YouTube: Comparison of thin wood wall paneling).
The pattern: available data supports key claims about cost and moisture sensitivity, but precise failure rates remain uncertain.
What’s unclear
- Exact percentage of installation failures caused by improper acclimation.
- Long‑term durability of composite vs. treated wood in high‑humidity sheds.
- Average cost savings for DIY boards when factoring in tool purchase.
- Whether PVC alternatives truly last 30 years in cold climates.
The catch: these gaps mean that homeowners should budget a margin of error for hidden costs or premature failure.
Expert and DIYer Perspectives
“The biggest mistake I see is people installing T&G right after bringing it home. Wood needs at least 48 hours to acclimate to the room’s humidity. If you skip that, you’ll have gaps or buckling within a year.”
— Building contractor cited on Trusscore blog
“Making your own tongue and groove boards sounds like a money‑saver, but unless you already own a router and plane, the tool cost eats up the savings. I’d only recommend it if you’re doing a large area and plan to use the tools again.”
— DIY blogger on Small Cabin Forum
The implication: both experts agree that acclimation and tool ownership are the make-or-break factors.
Summary
Tongue and groove boards remain the gold standard for a flush, sturdy wall or ceiling finish. But the extra cost and installation effort don’t always pay off — especially for sheds or temporary projects. Shiplap offers similar looks for less money, and PVC alternatives solve the moisture problem entirely. For the Irish or UK shed builder facing damp climates, the smart move is either well‑ventilated treated T&G or PVC panels. For the indoor DIYer, shiplap or thin wood paneling gets the job done faster without sacrificing the finished look. Homeowners matching materials to their environment and budget will get the best results from tongue and groove, shiplap, or PVC depending on moisture levels.
For those ready to move beyond alternatives, our complete installation guide covers everything from measuring to fitting.
Frequently asked questions
What type of wood is best for tongue and groove boards?
Pine is the most common and affordable for indoor use. Oak and cedar are harder and more moisture‑resistant but cost more. For sheds, treated pine or PVC is recommended.
How do you cut tongue and groove profiles without a router?
You can use a table saw with a dado blade for the groove and a rip blade for the tongue, or a hand plane and chisel for small projects. Accuracy is harder without a router.
Can tongue and groove boards be used outdoors?
Yes, with proper sealing and the right wood (cedar, treated pine, or tropical hardwoods). Outdoor T&G requires regular maintenance to prevent rot.
Do tongue and groove boards expand and contract?
Yes. Wood moves with humidity. Allow a 1–2 mm gap at each end and around obstructions. Acclimate boards for 48 hours before installation.
What is the difference between V‑joint and tongue and groove?
V‑joint is a profile cut into the face of tongue and groove boards to create a V‑shaped groove between boards. It’s a decorative variation on standard T&G.
How do you fix a tongue and groove board that won’t fit?
Check for debris in the groove, sand the tongue lightly, and use a tapping block with a hammer. If still tight, plane the tongue down slightly. Ensure the board is acclimated.
Is tongue and groove flooring suitable for bathrooms?
Engineered or vinyl tongue and groove flooring is suitable. Solid wood T&G in bathrooms requires perfect sealing and ventilation; many experts recommend against it.
More related posts
 Roman Numerals 1-100: Chart, Rules & Guide
 Roald Dahl Books in Order: Complete Age Guide
 Year 2 Common Exception Words: Full List & Teaching Tips
 What Is the First Sign of Kidney Problems – 10 Early Signs
 Cleveland Cavaliers vs Pacers Match Player Stats – Box Score, Top Scorers & Key Stats
 How Old Was Elvis When He Met Priscilla – He Was 24, She 14
 Elaine Paige: Bio, Marriage, Children, Net Worth, Where She Lives
 Nine Bodies in a Mexican Morgue: Plot, Killer & Ending Explained
